How to Setup Your 3Play Media Settings
A Step-by-Step Guide
Settings are an important part of your 3Play Media experience. This guide walks you through some helpful settings to start. Keep in mind, additional settings may be needed based on your needs.
Step 1: Log in to your 3Play Media account using your credentials.
Step 2: Next, click on the Settings button in the top right corner of your account. On the Settings page, you will see a list of Basic Settings on the left-hand side panel.
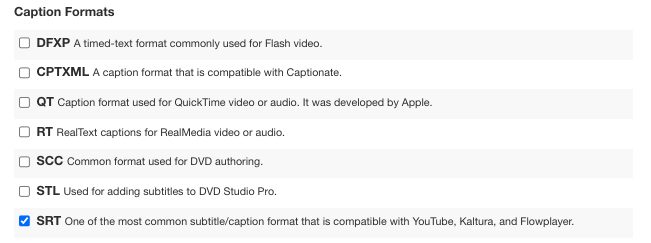
Favorite Formats
Your favorite formats will be used to enable quick download options and will be shown by default when downloading a file.
Step 1: Click on Favorite Formats
Step 2: Select your favorite formats for Captions, Transcription, and Audio Description by checking the box next to the format. You can select up to 6 favorite formats.
Step 3: When you have selected your preferred formats, scroll to the bottom of the page and click Save Changes.
For more information, visit the Favorite Formats section of our Support website.
Note: Favorite Formats are a project setting and not a user setting. Any changes you make will be applied to your project and could impact other users!
Default Order Instructions
Order Instructions include additional information and context for the transcript editor working on your content to help with efficiency and accuracy. They can be applied at the file, batch, folder, or project level.
Note: Order instructions do not refer to styling or formatting preferences.
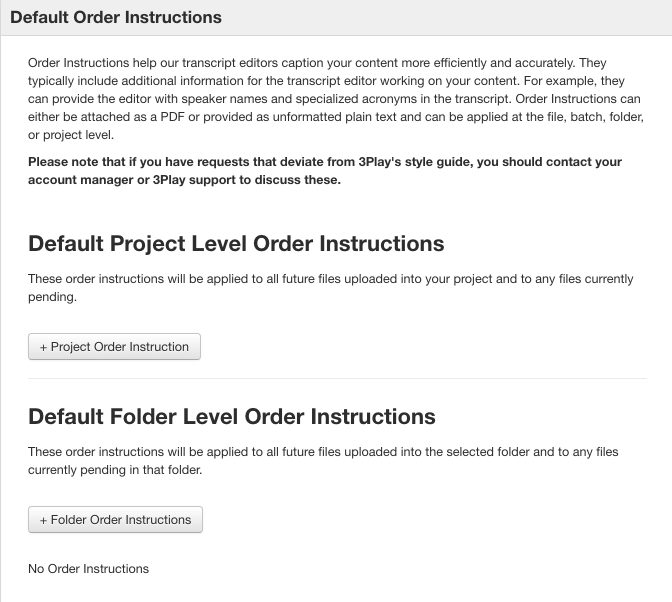
Step 1: Click on Default Order Instructions
Step 2: Select whether you want to upload Project Level or Folder Level instructions.
Step 3: Click on the button to add new instructions. You can add your instructions directly in the text box, or by uploading a PDF.
For more information, visit the Default Order Instructions section of our Support website.
Caption Settings
The Captions Settings enables you to configure the Default SMPTE Settings for SMPTE-based close captions.
Step 1: Click on Caption Settings
There are three components to your Caption Settings.
- Frame Rate
- Frame Rate Override
- Starting Timecode
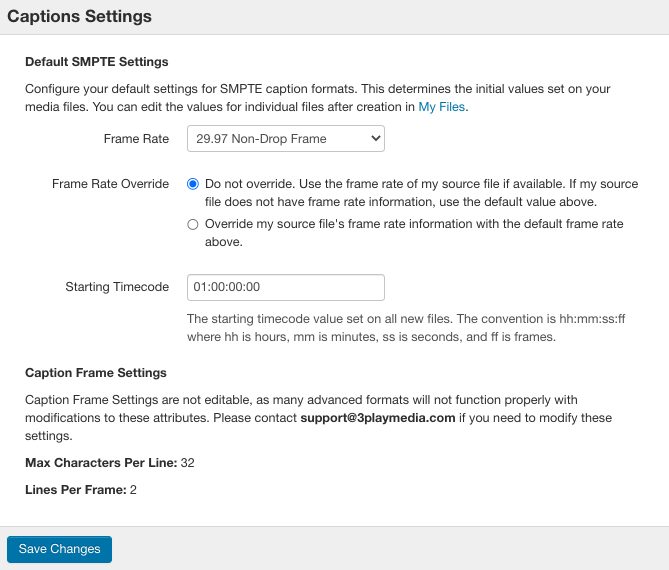
Step 2: Make your selections for each of the three categories.
Step 3: After making your selections on the Caption Settings page, be sure to click Save Changes.
For more information, visit the Caption Settings section of our Support website.
Transcription Settings
Please note: Transcription Settings are a project-level setting and not a user-level setting. Any changes you make will be applied to your entire project and could impact other users.
Step 1: Click on Transcription Settings
There are three components to your Transcription Settings.
- Keep Editing Flags?
- Speaker Identification
- Transcription Category
Step 2: Make your selections for each of the three categories.
Step 3: Before navigating away from the Transcription Settings page, be sure to click Save Changes.
For more information, visit the Transcription Settings section of our Support website.
Audio Description Settings
Step 1: Click on Audio Description Settings
Step 2: Choose a Speaker by selecting one of the eighteen options for the synthesized speech output that will be used in the audio description track.
Step 3: Choose a Speaking Rate. You can select either the Slow (200 WPM), Medium (250 WPM), or Fast (300 WPM) Speaking Rate.
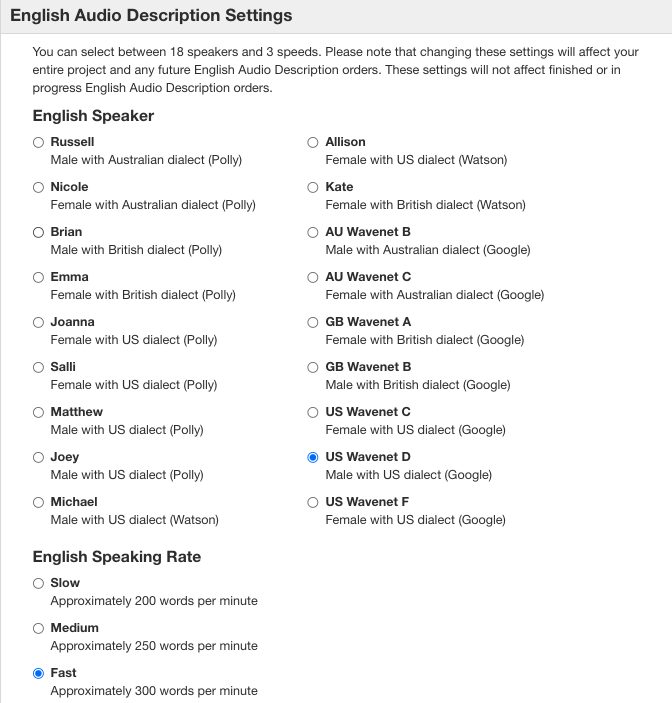
Step 4: Once an Audio Description Setting has changed click the play button on the left of one of the sample sentences to hear a preview with the speaker and speaking rate selected.
Step 5: Click Save if new settings have been selected.
For more information, visit the Audio Description Settings section of our Support website.